
If you are a college student trying to cook real meals without a full kitchen, the SENSARTE 1.5 Qt Nonstick Saucepan is a great tool to have. It’s small enough for a dorm shelf, easy to clean, and very versatile.
Whether you have a few minutes between classes or a free evening, these SENSARTE 1.5 Qt Nonstick Saucepan recipes are perfect for this pan and require minimal ingredients and little cooking experience.
Tips for Cooking in a Small Saucepan
Cook in batches: A 1.5 Qt pan is small, so avoid overcrowding it. Cook meat and vegetables in smaller batches for better flavor and even cooking.
Prep everything first: Since the pan heats up quickly and cooks quickly, chop and prepare all your ingredients before turning on the heat for a smoother process.
Use medium heat: Default to medium heat. High heat can quickly burn food and damage the nonstick coating. Medium heat gives you better control and results.
Deglaze the pan: After cooking meat, add a splash of broth, water, or wine, and scrape up the browned bits, which adds flavor to whatever you cook next.
Clean it gently: Don’t use metal utensils or harsh scrubbers on the nonstick surface. A soft sponge and warm, soapy water are all you need to keep it in good shape for years.

SENSARTE 1.5 Qt Nonstick Saucepan Recipes
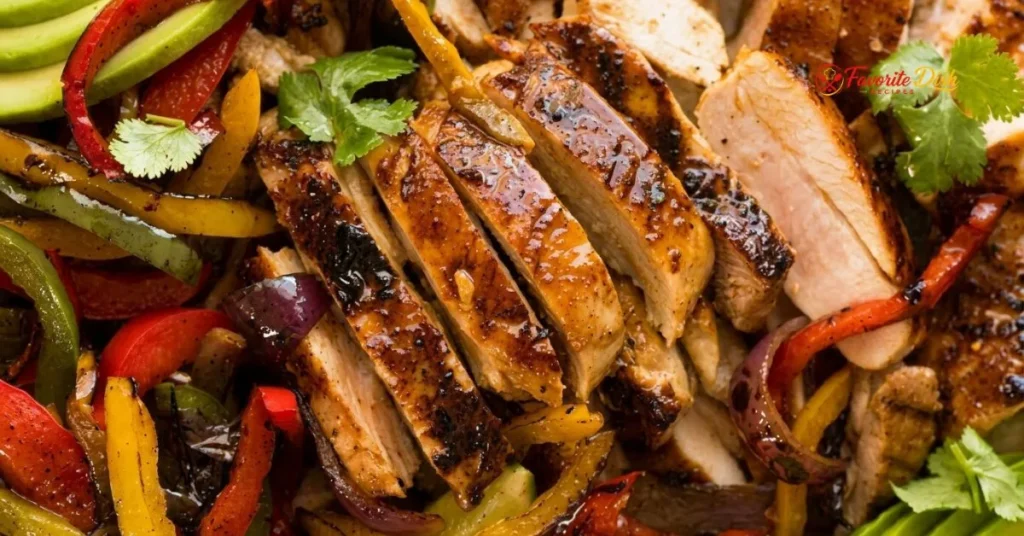
1. Chicken Fajitas
Serves: Serves 4
Prep Time: 20 minutes
Cook Time: 20 minutes (MEDIUM HEAT)
Total Time: 40 minutes
Ingredients
- 1 pound boneless, skinless chicken breasts
- 1 large onion
- 2 large bell peppers
- 2 cloves garlic
- 1 teaspoon chili powder
- ½ teaspoon ground cumin
- ¼ teaspoon paprika
- ¼ teaspoon cayenne pepper
- ½ teaspoon salt
- ¼ teaspoon black pepper
- 8 small flour tortillas
- 2 tablespoons vegetable oil
- 2 tablespoons freshly squeezed lime juice
- 2 tablespoons chopped fresh cilantro
- 1 large lime
Instructions
- Start by washing and chopping the onion and bell peppers into thin strips, and mince the garlic. This will help them cook evenly and quickly.
- In a small bowl, mix together the chili powder, cumin, paprika, cayenne pepper, salt, and black pepper. This spice blend will add flavor to the chicken and vegetables.
- Cut the chicken breasts into thin strips and place them in a large bowl. Sprinkle the spice blend over the chicken and toss to coat evenly.
- Heat 1 tablespoon of vegetable oil in the SENSARTE 1.5 Qt Nonstick Saucepan over MEDIUM HEAT. Add the chicken to the saucepan and cook for 5-7 minutes, or until browned and cooked through.
- Remove the chicken from the saucepan and set it aside on a plate. Add the remaining 1 tablespoon of vegetable oil to the saucepan.
- Add the chopped onion and bell peppers to the saucepan and cook for 5 minutes, or until they start to soften. Add the minced garlic and cook for an additional 1-2 minutes, or until the vegetables are tender.
- Add the cooked chicken back into the saucepan and stir to combine with the vegetables. Squeeze the lime juice over the top and sprinkle with chopped cilantro.
- Warm the flour tortillas by wrapping them in a damp paper towel and microwaving for 20-30 seconds. Assemble the fajitas by placing a portion of the chicken and vegetable mixture onto each tortilla and serving immediately.
- Turn off the heat and let the saucepan cool before washing. Serve the fajitas hot, with any desired toppings such as sour cream, salsa, or shredded cheese.
- To serve, slice the lime into wedges and serve on the side, and consider adding any additional toppings or garnishes as desired.
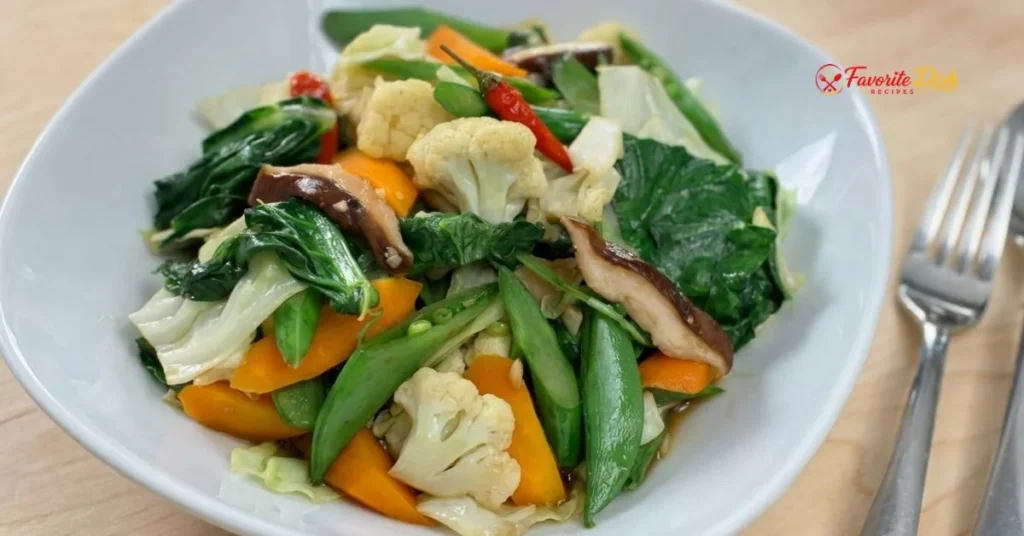
2. Vegetable Stir-Fry
Serves: Serves 2
Prep Time: 15 minutes
Cook Time: 10 minutes (MEDIUM HEAT)
Total Time: 25 minutes
Ingredients
- 2 tablespoons vegetable oil
- 1 small onion, chopped
- 2 cloves garlic, minced
- 1 cup broccoli florets
- 1 cup sliced bell peppers
- 1 cup sliced carrots
- 2 teaspoons soy sauce
- 1 teaspoon grated ginger
- ½ teaspoon salt
- ¼ teaspoon black pepper
- 2 green onions, chopped
- 2 tablespoons chopped fresh cilantro
Instructions
- Begin by washing and chopping the onion, garlic, broccoli, bell peppers, and carrots, making sure to cut them into uniform pieces so that they cook evenly. This step is crucial in ensuring that the vegetables are cooked through and tender. Set the chopped ingredients aside.
- Grease the SENSARTE 1.5 Qt Nonstick Saucepan with 1 tablespoon of vegetable oil to prevent the ingredients from sticking to the pan. This will also help to bring out the natural flavors of the vegetables.
- Heat the saucepan over MEDIUM HEAT, allowing the oil to warm up for about 2 minutes. This will help to create a non-stick surface and prevent the ingredients from sticking to the pan.
- Add the chopped onion and garlic to the saucepan and cook for about 3 minutes, or until they are translucent and fragrant. Stir occasionally to prevent burning.
- Add the broccoli, bell peppers, and carrots to the saucepan, stirring to combine with the onion and garlic. Cook for about 5 minutes, or until the vegetables are tender-crisp.
- In a small bowl, whisk together the soy sauce, ginger, salt, and black pepper. This will help to combine the flavors and create a smooth sauce.
- Pour the soy sauce mixture over the vegetables in the saucepan, stirring to combine. Cook for an additional 2 minutes, allowing the sauce to coat the vegetables evenly.
- Stir in the chopped green onions and cilantro, cooking for an additional minute. This will help to add fresh flavors to the dish.
- Remove the saucepan from the heat and let it cool for a few minutes. This will help to stop the cooking process and prevent the vegetables from becoming overcooked.
- Serve the vegetable stir-fry hot, garnished with additional green onions and cilantro if desired. This will help to add a pop of color and freshness to the dish.
3. Black Bean Soup
Serves: Serves 6
Prep Time: 30 minutes
Cook Time: 4 hours (LOW)
Total Time: 4 hours 30 minutes
Ingredients
- 1 tablespoon olive oil
- 1 large onion
- 3 cloves garlic
- 2 medium carrots
- 2 stalks celery
- 1 can diced tomatoes
- 1 teaspoon ground cumin
- 1 teaspoon smoked paprika
- ½ teaspoon salt
- ¼ teaspoon black pepper
- 4 cups vegetable broth
- 2 cups cooked black beans
- 1 can diced green chilies
- ¼ cup chopped fresh cilantro
- 2 tablespoons lime juice
- 1 teaspoon dried oregano
Instructions
- Start by washing and chopping the onion, garlic, carrots, and celery, making sure they are all roughly the same size so that they cook evenly, then set them aside in a large bowl. This step is crucial as it will help to develop the flavors of the soup. Take a few minutes to ensure that the vegetables are chopped uniformly.
- In the SENSARTE 1.5 Qt Nonstick Saucepan, heat the olive oil over MEDIUM HEAT, then add the chopped onion and cook until it is translucent, stirring occasionally to prevent burning, which should take about 8-10 minutes.
- Add the minced garlic to the saucepan and cook for an additional 1-2 minutes, stirring constantly to prevent the garlic from burning, until it is fragrant and slightly softened.
- Add the chopped carrots and celery to the saucepan and continue to cook for another 5 minutes, stirring occasionally, until they start to soften and develop a bit of color.
- Stir in the cumin, smoked paprika, salt, and pepper, cooking for 1 minute, until the spices are fragrant, which will help to bring out the flavors of the other ingredients.
- Add the diced tomatoes, vegetable broth, cooked black beans, and diced green chilies to the saucepan, stirring to combine, then bring the mixture to a boil.
- Reduce the heat to LOW and let the soup simmer, covered, for 4 hours, stirring occasionally, until the flavors have melded together and the soup has thickened slightly, which will help to develop the rich and creamy texture of the soup.
- After 4 hours, remove the saucepan from the heat and stir in the chopped cilantro, lime juice, and dried oregano, then let the soup rest for 10-15 minutes before serving, which will allow the flavors to meld together and the soup to cool slightly.
- Serve the Black Bean Soup hot, garnished with additional cilantro if desired, and enjoy the rich and creamy texture and the depth of flavors that have developed during the long simmering process.

4. Grilled Chicken And Vegetable Skewers
Serves: Serves 4
Prep Time: 20 minutes
Cook Time: 10 minutes (MEDIUM HEAT)
Total Time: 30 minutes
Ingredients
- 1 pound boneless, skinless chicken breast, cut into 1-inch pieces
- 1 large red bell pepper, cut into 1-inch pieces
- 1 large yellow bell pepper, cut into 1-inch pieces
- 1 large onion, cut into 1-inch pieces
- 2 large zucchinis, cut into 1-inch slices
- 2 large yellow squash, cut into 1-inch slices
- ¼ cup olive oil
- 2 cloves garlic, minced
- 1 teaspoon dried oregano
- 1 teaspoon paprika
- ½ teaspoon salt
- ¼ teaspoon black pepper
- ¼ cup chopped fresh parsley
Instructions
- Start by preparing the ingredients, wash the bell peppers, onion, zucchinis, and yellow squash, then cut them into 1-inch pieces or slices. Cut the chicken breast into 1-inch pieces and set aside.
- In a large bowl, whisk together the olive oil, garlic, oregano, paprika, salt, and black pepper. Add the chicken, bell peppers, onion, zucchinis, and yellow squash, and toss to coat.
- Cover the bowl with plastic wrap and refrigerate for at least 15 minutes to allow the ingredients to marinate.
- Preheat the grill pan or outdoor grill to MEDIUM HEAT. Thread the marinated chicken and vegetables onto skewers, leaving a little space between each piece.
- Place the skewers on the preheated grill pan or outdoor grill and cook for 5 minutes per side, or until the chicken is cooked through and the vegetables are tender.
- After 5 minutes of cooking, brush the skewers with the remaining marinade to keep them moist and add flavor.
- Continue cooking the skewers for an additional 5 minutes, or until they are cooked to your desired level of doneness.
- Once the skewers are cooked, remove them from the grill pan or outdoor grill and let them rest for a few minutes.
- To serve, place the skewers on a serving platter and garnish with chopped fresh parsley. Serve immediately and enjoy.
- Turn off the heat and discard any leftover marinade, make sure to clean the grill pan or outdoor grill after use to prevent any food residue from sticking.

5. Lentil Curry
Serves: Serves 4
Prep Time: 20 minutes
Cook Time: 30 minutes (MEDIUM HEAT)
Total Time: 50 minutes
Ingredients
- 2 tablespoons vegetable oil
- 1 large onion, chopped
- 2 cloves garlic, minced
- 1 teaspoon ground cumin
- 1 teaspoon curry powder
- 1 teaspoon turmeric
- ½ teaspoon salt
- ¼ teaspoon black pepper
- 2 cups red or brown lentils, rinsed and drained
- 2 cups water
- 2 medium tomatoes, diced
- 1 tablespoon tomato paste
- 2 tablespoons chopped fresh cilantro, for garnish
- 1 tablespoon lemon juice
Instructions
- Start by rinsing the lentils in a fine mesh sieve and draining them well. This step is crucial to remove any debris or impurities from the lentils. Next, chop the onion and mince the garlic, and set them aside.
- Heat the SENSARTE 1.5 Qt Nonstick Saucepan over MEDIUM HEAT and add the vegetable oil. Once the oil is hot, add the chopped onion and sauté for about 5 minutes, or until it is translucent and starting to caramelize.
- Add the minced garlic to the saucepan and cook for another minute, stirring constantly to prevent burning. The aroma of the garlic should be fragrant and appetizing.
- Stir in the ground cumin, curry powder, turmeric, salt, and pepper, and cook for 1-2 minutes, until the spices are fragrant. This step is essential to bring out the flavors of the spices and to create a flavorful base for the curry.
- Add the lentils to the saucepan and stir to coat them with the spice mixture. Cook for about 2 minutes, until the lentils are slightly toasted and fragrant.
- Add the water, diced tomatoes, and tomato paste to the saucepan, and bring the mixture to a boil. Once boiling, reduce the heat to LOW and simmer, covered, for about 20-25 minutes, or until the lentils are tender and the liquid has been absorbed.
- After 20-25 minutes of simmering, check the lentils for doneness by mashing one against the side of the saucepan. If they are still slightly crunchy, continue to simmer for another 5-10 minutes, until they are tender.
- Once the lentils are cooked, remove the saucepan from the heat and stir in the chopped cilantro and lemon juice. This step adds a fresh and tangy flavor to the curry, balancing out the richness of the spices.
- Let the curry rest for about 5 minutes before serving, which allows the flavors to meld together and the lentils to absorb any remaining liquid. Serve the Lentil Curry hot, garnished with additional cilantro if desired.

6. Grilled Cheese Sandwich
Serves: Serves 2
Prep Time: 5 minutes
Cook Time: 2 minutes per side (MEDIUM HEAT)
Total Time: 10 minutes
Ingredients
- 2 slices of bread
- 2 tablespoons of butter
- 2 slices of cheese
- ¼ teaspoon of salt
- ⅛ teaspoon of black pepper
- 1 tablespoon of water
Instructions
- Begin by preparing the bread slices, laying them out on a clean and flat surface. Take one slice of bread and butter one side, making sure to cover the entire surface. This will help create a golden-brown crust when cooked. Repeat the same step with the second slice of bread.
- Next, place one slice of bread, buttered side down, in the SENSARTE 1.5 Qt Nonstick Saucepan. Make sure the saucepan is set over MEDIUM HEAT and let it heat up for about 1 minute before adding the bread.
- Once the bread is in the saucepan, add one slice of cheese on top of the bread. You can use any type of cheese you prefer, but make sure it is sliced thinly to ensure even melting.
- Place the second slice of bread, buttered side up, on top of the cheese. Press down gently on the sandwich to ensure the bread is in contact with the cheese.
- Cook the sandwich for 2 minutes or until the bread develops a golden-brown crust and the cheese starts to melt. You will notice the bread starting to crisp up and the cheese melting when it is time to flip the sandwich.
- Use a spatula to carefully flip the sandwich over and cook for another 2 minutes or until the other side is also golden brown. Make sure to cook the sandwich over MEDIUM HEAT to prevent burning.
- While the sandwich is cooking, prepare a plate for serving. You can add a side of tomato soup or a green salad to complement the grilled cheese sandwich.
- Once the sandwich is cooked, remove it from the saucepan and place it on the prepared plate. Let it rest for about 1 minute before serving to allow the cheese to set and the bread to cool down slightly.
- To serve, cut the sandwich in half and garnish with a sprinkle of salt and a few grinds of black pepper. You can also add a dollop of ketchup or mayonnaise if you prefer.
- Finally, turn off the heat and let the saucepan cool down before washing it with soap and water. This will help prevent any food residue from sticking to the nonstick surface.

7. Chicken Tikka Masala
Serves: Serves 6
Prep Time: 30 minutes
Cook Time: 2 hours (LOW)
Total Time: 2 hours 30 minutes
Ingredients
- 1 ¾ pounds boneless, skinless chicken breast or thighs, cut into 1 ½ inch pieces
- 2 medium onions, diced
- 3 cloves of garlic, minced
- 1 medium bell pepper, diced
- 1 can of diced tomatoes, 14 ½ oz
- 1 cup of chicken broth
- ½ cup of heavy cream
- 2 tablespoons of tomato paste
- 2 teaspoons of garam masala
- 1 teaspoon of ground cumin
- 1 teaspoon of smoked paprika
- ½ teaspoon of salt
- ¼ teaspoon of black pepper
- 2 tablespoons of butter
- 2 tablespoons of olive oil
- Fresh cilantro, chopped, for garnish
Instructions
- Start by preparing the ingredients, wash and chop the onions, garlic, and bell pepper, and cut the chicken into 1 ½ inch pieces. Rinse the chicken under cold water and pat it dry with paper towels. Season the chicken with salt, pepper, and garam masala.
- In a large bowl, whisk together the chicken broth, heavy cream, tomato paste, cumin, smoked paprika, and a pinch of salt and pepper. Add the chicken to the bowl and toss to coat. Cover the bowl with plastic wrap and refrigerate for at least 30 minutes or up to 2 hours.
- Heat 1 tablespoon of butter and 1 tablespoon of olive oil in a large saucepan over MEDIUM HEAT. Remove the chicken from the marinade, letting any excess liquid drip off. Add the chicken to the saucepan and cook until browned on all sides and cooked through, about 6-8 minutes. Transfer the chicken to a plate and set aside.
- In the same saucepan, add the remaining 1 tablespoon of butter and 1 tablespoon of olive oil over MEDIUM HEAT. Add the diced onions and cook until they are translucent and starting to caramelize, about 8-10 minutes.
- Add the minced garlic and diced bell pepper to the saucepan and cook for an additional 2-3 minutes, until the garlic is fragrant and the bell pepper is tender.
- Stir in the diced tomatoes, chicken broth, and browned chicken. Bring the mixture to a simmer and cook for 10-15 minutes, stirring occasionally, until the sauce has thickened and the chicken is fully coated.
- Reduce the heat to LOW and let the sauce simmer for an additional 1-2 hours, stirring occasionally, until the flavors have melded together and the chicken is tender.
- After 2 hours, turn off the heat and let the chicken tikka masala rest for 10-15 minutes before serving. Garnish with chopped fresh cilantro and serve over basmati rice or with naan bread.
- To serve, divide the chicken and sauce among individual plates or a large serving dish. Serve immediately and enjoy.

8. Breakfast Burrito
Serves: Serves 2
Prep Time: 20 minutes
Cook Time: 20 minutes (MEDIUM HEAT)
Total Time: 40 minutes
Ingredients
- 2 large eggs
- 1 ½ teaspoons salt
- ¼ teaspoon black pepper
- 2 tablespoons butter
- 2 small flour tortillas
- 1 cup cooked sausage, such as chorizo or breakfast sausage
- 1 cup shredded cheddar cheese
- 1 can of diced green chilies, drained
- 1 small onion, diced
- 2 cloves garlic, minced
- 1 tablespoon chopped fresh cilantro
- 1 tablespoon olive oil
Instructions
- Crack the eggs into a bowl and whisk them together with a fork until the whites and yolks are fully incorporated. Add the salt and pepper to the eggs and whisk until they are well combined.
- Heat the butter in the SENSARTE 1.5 Qt Nonstick Saucepan over MEDIUM HEAT until it has melted and the foam has subsided.
- Add the diced onion to the saucepan and cook until it is translucent and starting to caramelize, stirring occasionally.
- Add the minced garlic to the saucepan and cook for 1-2 minutes, stirring constantly to prevent the garlic from burning.
- Add the cooked sausage to the saucepan, breaking it up with a spoon as it cooks, until it is heated through and starting to brown.
- Pour the whisked eggs over the sausage mixture in the saucepan and scramble them until they are cooked through, stirring constantly to prevent the eggs from burning.
- Warm the tortillas by wrapping them in a damp paper towel and microwaving them for 20-30 seconds.
- Assemble the burritos by spooning the egg and sausage mixture onto the center of each tortilla, followed by a sprinkle of shredded cheese, a spoonful of diced green chilies, and a sprinkle of chopped cilantro.
- Fold the bottom edge of each tortilla up over the filling, then fold in the sides and roll the burrito up tightly.
- Serve the burritos hot, with your choice of salsa, sour cream, or other toppings.

9. Chicken and Vegetable Soup
Serves: Serves 4
Prep Time: 20 minutes
Cook Time: 30 minutes (MEDIUM HEAT)
Total Time: 50 minutes
Ingredients
- 2 pounds boneless, skinless chicken breast or thighs
- 1 large onion, chopped
- 3 cloves of garlic, minced
- 2 medium carrots, peeled and chopped
- 2 stalks of celery, chopped
- 1 large can of diced tomatoes
- 4 cups of chicken broth
- 1 teaspoon of dried thyme
- ½ teaspoon of dried basil
- ½ teaspoon of salt
- ¼ teaspoon of black pepper
- 2 tablespoons of olive oil
- 2 tablespoons of chopped fresh parsley
Instructions
- Begin by chopping the onion, carrots, and celery, and set them aside in a bowl. Next, mince the garlic and add it to the bowl with the chopped vegetables.
- In the SENSARTE 1.5 Qt Nonstick Saucepan, heat 1 tablespoon of olive oil over MEDIUM HEAT. Add the chopped vegetables and cook until they are tender, about 5 minutes.
- Add the chicken to the saucepan and cook until it is browned on all sides, about 5-7 minutes. Remove the chicken from the saucepan and set it aside on a plate.
- Add the remaining 1 tablespoon of olive oil to the saucepan, then add the diced tomatoes, chicken broth, thyme, basil, salt, and pepper. Stir to combine, scraping up any browned bits from the bottom of the pan.
- Return the chicken to the saucepan and bring the mixture to a boil. Reduce the heat to LOW and simmer, covered, for 15 minutes, or until the chicken is cooked through and the vegetables are tender.
- Check the soup for seasoning and adjust as needed. If the soup needs more broth, add a little water or additional chicken broth.
- Continue to simmer the soup for an additional 10 minutes, or until the flavors have melded together and the soup has reached the desired consistency.
- Remove the saucepan from the heat and let it cool slightly. Serve the soup hot, garnished with chopped fresh parsley and crusty bread on the side, if desired.

10. Quesadilla
Serves: Serves 2
Prep Time: 10 minutes
Cook Time: 10 minutes (MEDIUM HEAT)
Total Time: 20 minutes
Ingredients
- 2 large flour tortillas
- 1 cup shredded cheese
- ½ cup diced onion
- ¼ cup diced bell pepper
- ¼ cup cooked chicken
- 1 tablespoon olive oil
- 1 teaspoon cumin
- ½ teaspoon paprika
- Salt and pepper to taste
- 2 tablespoons chopped fresh cilantro
- 2 tablespoons sour cream
- 1 lime, cut into wedges
Instructions
- Start by preparing the ingredients, washing and chopping the onion and bell pepper into small pieces. It is essential to chop the vegetables finely so they cook evenly and quickly. Make sure to rinse the chopped vegetables with cold water to remove any excess dirt or debris.
- In a small bowl, mix together the cumin and paprika, and set aside. This spice blend will add flavor to the quesadillas, so make sure to mix it well. You can also add a pinch of salt and pepper to the spice blend to enhance the flavor.
- Heat the SENSARTE 1.5 Qt Nonstick Saucepan over MEDIUM HEAT, and add the olive oil to the pan. Once the oil is hot, add the chopped onion and bell pepper, and cook until they are soft and lightly browned. Stir the vegetables occasionally to prevent them from burning.
- Add the cooked chicken to the pan, and stir to combine with the onion and bell pepper mixture. Cook for an additional 2-3 minutes, until the chicken is heated through. Make sure to break up the chicken into small pieces so it cooks evenly.
- In a large bowl, combine the shredded cheese, cooked chicken and vegetable mixture, and spice blend. Mix well to combine, making sure the cheese is evenly distributed. You can also add a squeeze of fresh lime juice to the mixture to add a bit of brightness.
- Place one of the tortillas in the pan, and sprinkle half of the cheese and chicken mixture onto half of the tortilla. Fold the tortilla in half to enclose the filling, and cook for 2-3 minutes, until the tortilla is lightly browned and the cheese is melted. Repeat with the second tortilla and the remaining filling.
- Flip the quesadillas, and cook for an additional 2-3 minutes, until the other side is also lightly browned and the cheese is melted. Make sure to cook the quesadillas over MEDIUM HEAT, as high heat can burn the tortillas.
- Remove the quesadillas from the pan, and place them on a cutting board. Let them rest for a few minutes, before slicing them into wedges and serving. Serve the quesadillas hot, garnished with chopped cilantro, sour cream, and a squeeze of lime juice. Turn off the heat, and make sure the pan is cool before washing it.

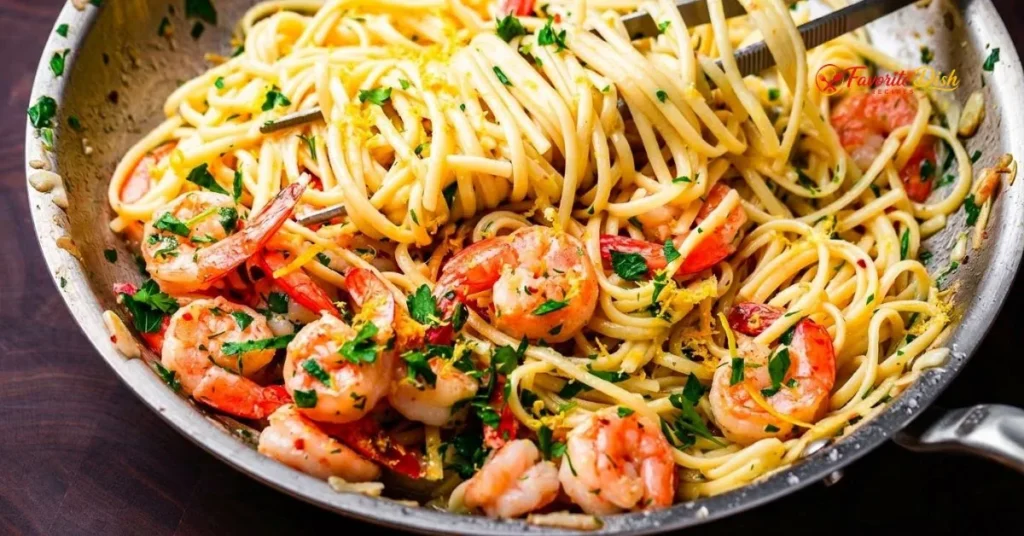
11. Shrimp and Pasta
Serves: Serves 4
Prep Time: 20 minutes
Cook Time: 15 minutes (MEDIUM HEAT)
Total Time: 35 minutes
Ingredients
- 1 pound large shrimp, peeled and deveined
- 8 ounces pasta of your choice
- 2 tablespoons olive oil
- 1 onion, chopped
- 3 cloves garlic, minced
- 1 cup cherry tomatoes, halved
- 1 cup white wine
- 1 cup chicken broth
- 1 teaspoon dried basil
- 1 teaspoon dried oregano
- salt and pepper to taste
- ¼ cup grated parmesan cheese
- ¼ cup chopped fresh parsley
Instructions
- Rinse the shrimp under cold water and pat them dry with paper towels to remove excess moisture. Remove the shells and devein the shrimp, then set them aside on a plate.
- Chop the onion and mince the garlic, and set them aside in separate bowls. Heat the olive oil in the SENSARTE 1.5 Qt Nonstick Saucepan over MEDIUM HEAT.
- Add the chopped onion to the saucepan and cook until it is translucent, stirring occasionally, for about 5 minutes. Add the minced garlic and cook for an additional minute, stirring constantly to prevent burning.
- Add the cherry tomatoes to the saucepan and cook for 3-4 minutes, stirring occasionally, until they start to release their juices.
- Add the white wine and chicken broth to the saucepan, and stir to combine with the onion and garlic mixture. Bring the mixture to a simmer and cook for 5 minutes, stirring occasionally, until the liquid has reduced slightly.
- Add the pasta to the saucepan, stirring to combine with the liquid and cook for 8-10 minutes, or until the pasta is al dente, stirring occasionally.
- Add the shrimp to the saucepan and cook for an additional 2-3 minutes, or until they are pink and cooked through, stirring constantly to prevent overcooking.
- Remove the saucepan from the MEDIUM HEAT and stir in the dried basil, dried oregano, salt, and pepper.
- Serve the shrimp and pasta hot, topped with grated parmesan cheese and chopped fresh parsley, and enjoy immediately.
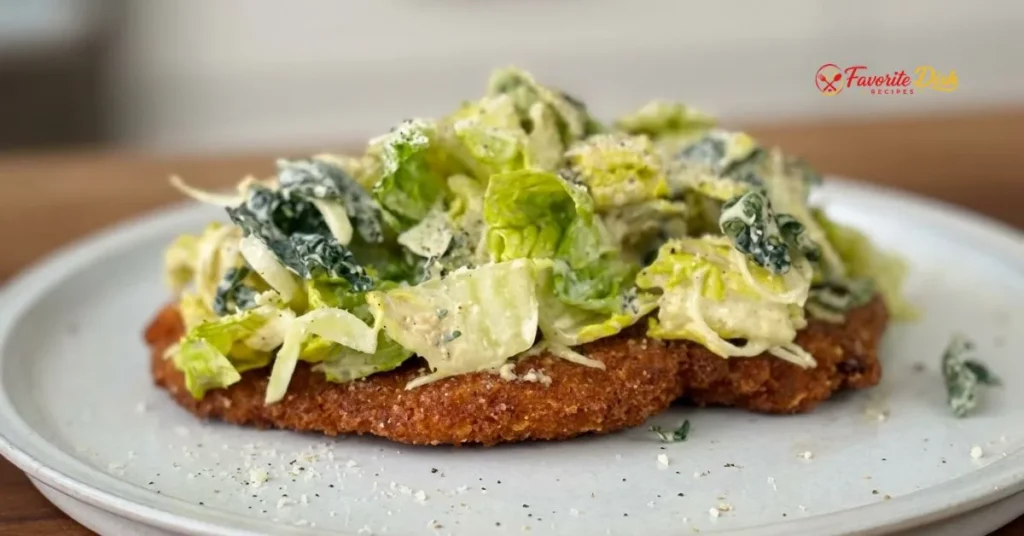
12. Chicken Caesar Salad
Serves: Serves 2
Prep Time: 20 minutes
Cook Time: 15 minutes (MEDIUM HEAT)
Total Time: 35 minutes
Ingredients
- 1 pound boneless, skinless chicken breasts
- 1 head of romaine lettuce, chopped
- 1 cup of cherry tomatoes, halved
- ½ cup of homemade or store-bought Caesar dressing
- ¼ cup of grated Parmesan cheese
- ¼ cup of chopped fresh parsley
- 2 tablespoons of olive oil
- 1 teaspoon of Dijon mustard
- 1 teaspoon of lemon juice
- Salt and pepper to taste
- 2 cloves of garlic, minced
- 1 cup of croutons
Instructions
- Begin by washing and chopping the romaine lettuce, and set it aside in a large bowl to await the other ingredients. Make sure to dry the lettuce thoroughly with a salad spinner or paper towels to prevent excess moisture in the salad. This step is crucial in maintaining the crisp texture of the lettuce.
- Next, chop the cherry tomatoes in half and add them to the bowl with the lettuce, mixing gently to combine. Be careful not to bruise the lettuce or crush the tomatoes during this process.
- In a small bowl, whisk together the Caesar dressing, Dijon mustard, lemon juice, and minced garlic until well combined. The dressing should be smooth and creamy, with no visible lumps or grainy texture.
- Heat the olive oil in the SENSARTE 1.5 Qt Nonstick Saucepan over MEDIUM HEAT, then add the chicken breasts and cook until browned on both sides and cooked through, about 5-7 minutes per side. The internal temperature of the chicken should reach 165F for food safety.
- Once the chicken is cooked, remove it from the saucepan and let it rest for a few minutes before slicing it into thin strips. This resting time allows the juices to redistribute within the meat, making it more tender and flavorful.
- Add the sliced chicken to the bowl with the lettuce and tomatoes, and pour the Caesar dressing mixture over the top. Toss gently to combine, making sure that all the ingredients are well coated with the dressing.
- Sprinkle the grated Parmesan cheese and chopped parsley over the salad, and toss again to combine. The cheese should be evenly distributed throughout the salad, adding a salty and nutty flavor to each bite.
- Finally, add the croutons to the salad and toss one last time to combine, then serve immediately. The croutons should add a satisfying crunch to the salad, while the dressing and cheese provide a rich and creamy element.
- To serve, divide the salad between two plates and garnish with additional parsley if desired. The salad should be fresh and vibrant, with a balance of flavors and textures that is both satisfying and delicious.
- Turn off the heat and let the saucepan cool before washing it with soap and water, and store any leftover salad in an airtight container in the refrigerator for up to 24 hours.
13. Beef Tacos
Serves: Serves 6
Prep Time: 20 minutes
Cook Time: 1 hour (MEDIUM HEAT)
Total Time: 1 hour 20 minutes
Ingredients
- 1 pound ground beef
- 1 medium onion, diced
- 2 cloves garlic, minced
- 1 medium bell pepper, diced
- 1 can diced tomatoes
- 1 packet taco seasoning
- 8 tacos shells
- 1 cup shredded cheese
- 1 cup shredded lettuce
- 1 cup diced tomatoes
- ½ cup diced red onion
- ¼ cup chopped fresh cilantro
- 2 tablespoons olive oil
- 1 teaspoon salt
- ½ teaspoon black pepper
- 1 tablespoon lime juice
Instructions
- Begin by heating the SENSARTE 1.5 Qt Nonstick Saucepan over MEDIUM HEAT, then add 1 tablespoon of olive oil to the pan and swirl it around to coat the bottom. Once the oil is hot, add the diced onion and cook until it is translucent, which should take about 5 minutes. Stir the onion occasionally to prevent it from burning.
- Add the minced garlic to the pan and cook for an additional 1-2 minutes, stirring constantly to prevent the garlic from burning. The garlic should be fragrant and lightly browned.
- Add the ground beef to the pan, breaking it up with a spoon as it cooks. Cook the beef until it is fully browned, which should take about 5-7 minutes. Stir the beef occasionally to prevent it from burning.
- Add the diced bell pepper to the pan and cook until it is tender, which should take about 5 minutes. Stir the bell pepper occasionally to prevent it from burning.
- Add the can of diced tomatoes, packet of taco seasoning, salt, and black pepper to the pan, and stir to combine. Bring the mixture to a simmer and let it cook for 10-15 minutes, stirring occasionally, until the flavors have melded together and the sauce has thickened.
- While the beef mixture is cooking, prepare the toppings by shredding the cheese, lettuce, and diced tomatoes, and chopping the fresh cilantro. Also, warm the tacos shells according to the package instructions.
- After the beef mixture has finished cooking, turn off the heat and stir in the chopped cilantro and lime juice. Let the mixture rest for a few minutes to allow the flavors to meld together.
- To serve, spoon the beef mixture into the warmed tacos shells and top with the shredded cheese, lettuce, diced tomatoes, and any other desired toppings. Serve immediately and enjoy.
- Finally, turn off the heat and let the saucepan cool before washing it with soap and water, and store any leftover beef mixture in an airtight container in the refrigerator for up to 3 days.

14. Chicken and Mushroom Creamy Pasta
Serves: Serves 4
Prep Time: 20 minutes
Cook Time: 20 minutes (MEDIUM HEAT)
Total Time: 40 minutes
Ingredients
- 1 pound boneless, skinless chicken breast
- 2 cups mixed mushrooms, such as button, cremini, and shiitake
- 2 tablespoons olive oil
- 1 small onion, finely chopped
- 2 cloves garlic, minced
- 1 cup heavy cream
- 1 cup grated Parmesan cheese
- 1 teaspoon dried thyme
- ½ teaspoon salt
- ¼ teaspoon black pepper
- 8 ounces pasta of your choice, such as fettuccine or linguine
- 2 tablespoons chopped fresh parsley
- 2 tablespoons butter
Instructions
- Begin by washing and chopping the mushrooms, onion, and parsley, and set them aside in separate bowls. Make sure to pat the mushrooms dry with a paper towel to remove excess moisture. This step is crucial in preventing excess liquid from affecting the sauce.
- In the SENSARTE 1.5 Qt Nonstick Saucepan, heat 1 tablespoon of olive oil over MEDIUM HEAT. Once the oil is hot, add the chopped onion and cook until it is translucent, stirring occasionally.
- Add the minced garlic to the saucepan and cook for 1 minute, stirring constantly to prevent burning. Be careful not to overcook the garlic, as it can quickly become bitter.
- Add the chopped mushrooms to the saucepan and cook until they release their liquid and start to brown, stirring occasionally. This step is essential in developing the rich flavor of the dish.
- Add the chicken breast to the saucepan and cook until it is browned on all sides and cooked through, about 5-7 minutes. Remove the chicken from the saucepan and set it aside on a plate.
- In the same saucepan, add the heavy cream, Parmesan cheese, thyme, salt, and pepper. Stir the mixture over MEDIUM HEAT until the cheese is melted and the sauce is smooth. Bring the sauce to a simmer and let it cook for 2-3 minutes, stirring occasionally.
- Add the cooked pasta to the saucepan and toss it with the creamy sauce until the pasta is well coated. If using, add the cooked chicken back into the saucepan and toss everything together.
- Reduce the heat to LOW HEAT and let the pasta simmer in the sauce for 2-3 minutes, stirring occasionally, until the sauce has thickened and the pasta is heated through. Be careful not to overcook the pasta, as it can quickly become mushy.
- Remove the saucepan from the heat and stir in the chopped parsley and butter until the butter is melted. Let the pasta rest for 2-3 minutes before serving, which allows the flavors to meld together.
- Serve the Chicken and Mushroom Creamy Pasta hot, garnished with additional parsley if desired. Make sure to turn off the heat and let the saucepan cool before washing it, as the nonstick surface can be damaged by extreme temperature changes.

15. Breakfast Omelette
Serves: Serves 2
Prep Time: 10 minutes
Cook Time: 10 minutes (MEDIUM HEAT)
Total Time: 20 minutes
Ingredients
- 2 large eggs
- 1 tablespoon butter
- 1 tablespoon chopped fresh parsley
- 1 tablespoon grated cheddar cheese
- ½ teaspoon salt
- ¼ teaspoon black pepper
- 1 tablespoon diced bell pepper
- 1 tablespoon diced onion
- 1 tablespoon diced mushroom
Instructions
- Crack the eggs into a bowl and whisk them together with a fork until the whites and yolks are fully incorporated. Add the salt and pepper to the eggs and whisk until well combined.
- Heat the SENSARTE 1.5 Qt Nonstick Saucepan over MEDIUM HEAT and add the butter, letting it melt and coat the bottom of the pan.
- Once the butter has melted, add the diced bell pepper, onion, and mushroom to the saucepan and cook until they are tender, about 3-4 minutes.
- In a separate bowl, mix the grated cheddar cheese and chopped parsley together.
- Pour the egg mixture over the cooked vegetables in the saucepan and let it cook for about 2 minutes, until the edges start to set.
- Use a spatula to gently lift the edges of the omelette and tilt the pan so the uncooked egg can flow to the top.
- Once the eggs are almost set, sprinkle the cheese and parsley mixture over half of the omelette.
- Use the spatula to fold the other half of the omelette over the filling, pressing gently to ensure the edges are aligned.
- Cook for an additional 1-2 minutes, until the cheese is melted and the omelette is cooked through.
- Remove the saucepan from the heat and use the spatula to carefully slide the omelette out of the pan onto a plate.
- Let the omelette rest for a minute or two before serving, and garnish with additional parsley if desired.

16. Chicken Feta Phyllo Triangles
Serves: Serves 4
Prep Time: 30 minutes
Cook Time: 20 minutes (MEDIUM HEAT)
Total Time: 50 minutes
Ingredients
- 1 ½ pounds boneless, skinless chicken breast, cut into small pieces
- 1 cup crumbled feta cheese
- ¼ cup chopped fresh parsley
- ¼ cup chopped fresh dill
- 2 cloves garlic, minced
- 1 ½ teaspoons olive oil
- ½ teaspoon salt
- ¼ teaspoon black pepper
- 2 tablespoons lemon juice
- 1 package phyllo dough, thawed
- 1 egg, beaten
- 1 tablespoon water
- 1 tablespoon butter, melted
Instructions
- Begin by preheating the SENSARTE 1.5 Qt Nonstick Saucepan over MEDIUM HEAT, and greasing it with 1 teaspoon of olive oil to prevent the phyllo triangles from sticking. While the saucepan is heating up, prepare the filling by combining the chicken, feta cheese, parsley, dill, garlic, salt, and pepper in a bowl. Mix well to combine.
- In a separate bowl, whisk together the lemon juice and egg, and set aside. This mixture will be used to brush the phyllo dough and help the triangles stick together.
- Remove the phyllo dough from the package and cut it into 4 equal squares, approximately 12 inches per side. Cover the phyllo dough with a damp cloth to prevent it from drying out.
- To assemble the triangles, place a tablespoon of the chicken and feta mixture in the center of each phyllo square, leaving a 1-inch border around the edges. Brush the edges with the egg and lemon juice mixture.
- Fold the phyllo squares into triangles by bringing the two opposite corners together to form a point, and then folding in the remaining two corners to form a triangle. Brush the tops with the melted butter.
- Place the triangles in the preheated saucepan, seam-side down, and cook for 5 minutes on the first side, or until they are golden brown. Use a spatula to carefully flip the triangles over and cook for an additional 5 minutes, or until they are golden brown on the second side.
- Remove the triangles from the saucepan and place them on a paper towel-lined plate to drain any excess oil. While the triangles are still warm, brush them with the remaining egg and lemon juice mixture to give them a glaze.
- To serve, place the triangles on a serving platter and garnish with additional parsley and lemon wedges, if desired. Turn off the heat and let the triangles rest for a few minutes before serving to allow the filling to set and the flavors to meld together.

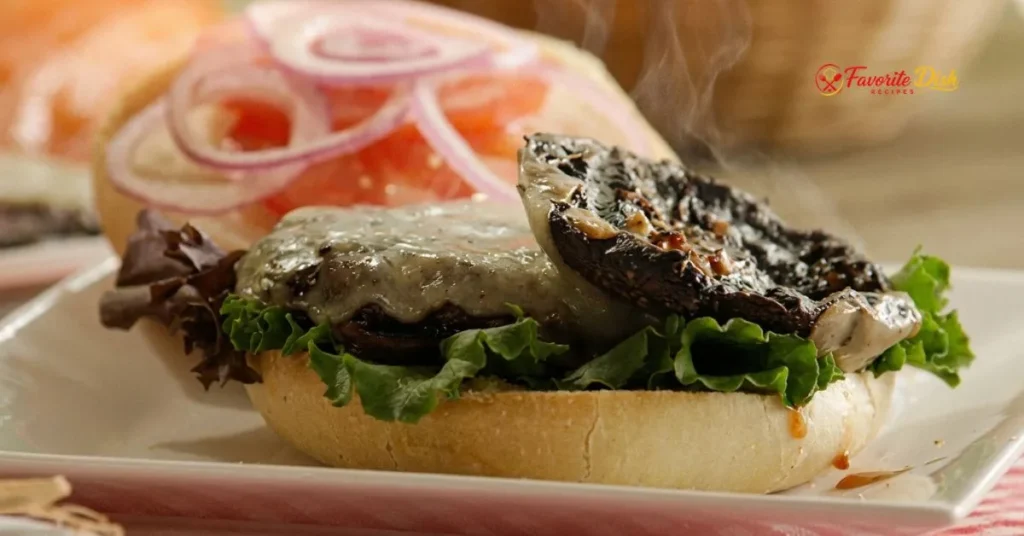
17. Grilled Portobello Mushroom Burgers
Serves: 4
Prep Time: 20 minutes
Cook Time: 10 minutes (MEDIUM HEAT)
Total Time: 30 minutes
Ingredients
- 2 tablespoons olive oil
- 4 large portobello mushrooms
- 1 small onion, finely chopped
- 2 cloves garlic, minced
- 1 teaspoon dried thyme
- 1 teaspoon dried oregano
- 1 teaspoon salt
- ¼ teaspoon black pepper
- 4 hamburger buns
- 4 slices of cheese, such as cheddar or Swiss
- 4 lettuce leaves
- 4 tomato slices
- 2 tablespoons mayonnaise
- 2 tablespoons ketchup
Instructions
- Begin by washing the portobello mushrooms and removing the stems. Finely chop the onion and mince the garlic. In a small bowl, mix together the chopped onion, minced garlic, dried thyme, dried oregano, salt, and black pepper.
- In the SENSARTE 1.5 Qt Nonstick Saucepan, heat 1 tablespoon of olive oil over MEDIUM HEAT. Add the onion and garlic mixture to the saucepan and cook for 2-3 minutes, or until the onion is translucent.
- Add the remaining 1 tablespoon of olive oil to the saucepan and brush it evenly over the bottom. Place the portobello mushrooms in the saucepan, cap side down, and cook for 3-4 minutes, or until they start to soften.
- Flip the mushrooms over and cook for an additional 3-4 minutes, or until they are tender and lightly browned.
- While the mushrooms are cooking, toast the hamburger buns by placing them on the counter for a few minutes to allow them to dry out slightly, then grilling them lightly or cooking them in the saucepan for a minute on each side.
- Assemble the burgers by spreading a layer of mayonnaise on the bottom bun, followed by a cooked portobello mushroom, a slice of cheese, a lettuce leaf, and a tomato slice.
- Top the burger with the top bun and drizzle with ketchup. Repeat the process to assemble the remaining burgers.
- Once the burgers are assembled, let them rest for a few minutes to allow the flavors to meld together. Serve immediately and enjoy.
- To turn off the saucepan, simply remove it from the heat source and let it cool. Be careful when handling the hot saucepan, and never leave it unattended.
18. Beef and Onion Meatballs
Serves: 6
Prep Time: 20 minutes
Cook Time: 20 minutes (MEDIUM HEAT)
Total Time: 40 minutes
Ingredients
- 1 pound ground beef
- 1 large onion finely chopped
- 2 cloves garlic minced
- 1 egg
- ½ cup breadcrumbs
- ¼ cup grated Parmesan cheese
- ¼ cup chopped fresh parsley
- ½ teaspoon salt
- ¼ teaspoon black pepper
- ¼ teaspoon dried oregano
- 2 tablespoons olive oil
Instructions
- In a large bowl, combine the ground beef, chopped onion, minced garlic, egg, breadcrumbs, Parmesan cheese, parsley, salt, pepper, and dried oregano. Use your hands or a wooden spoon to mix the ingredients until they are just combined, being careful not to overmix.
- Use your hands to shape the mixture into small meatballs, about 1 1/2 inches in diameter. You should end up with around 20-25 meatballs.
- Heat the SENSARTE 1.5 Qt Nonstick Saucepan over MEDIUM HEAT and add the olive oil. Once the oil is hot, add 5-6 meatballs to the pan, being careful not to overcrowd it.
- Cook the meatballs for 5-6 minutes on each side, or until they are browned on the outside and cooked through. Repeat with the remaining meatballs.
- Once the meatballs are cooked, remove them from the pan and set them aside on a plate. Leave the drippings in the pan.
- Reduce the heat to LOW and add a little bit of water to the pan, scraping up any browned bits from the bottom. Bring the liquid to a simmer and cook for 2-3 minutes, or until it has thickened slightly.
- Add the cooked meatballs back to the pan and simmer them in the sauce for 5-7 minutes, or until they are fully coated.
- Remove the pan from the heat and let the meatballs rest for a few minutes before serving. Serve hot, garnished with additional parsley if desired.
- To serve, place the meatballs on a serving platter or individual plates and spoon some of the sauce over the top. You can also serve them with pasta, rice, or in a sub sandwich.
- Turn off the heat and let the meatballs cool to room temperature before refrigerating or freezing them for later use.

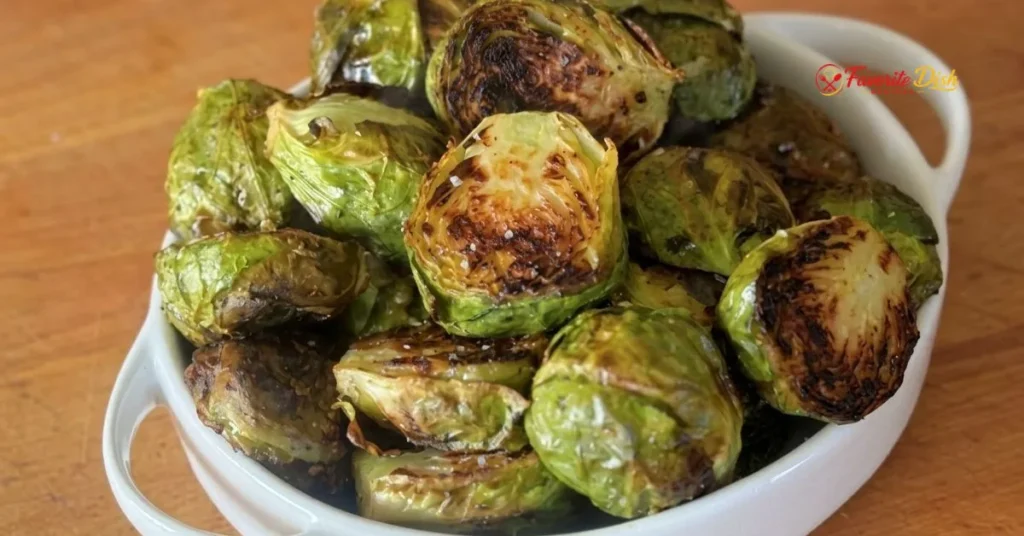
19. Roasted Brussels Sprouts
Serves: 4
Prep Time: 15 minutes
Cook Time: 20 minutes (MEDIUM HEAT)
Total Time: 35 minutes
Ingredients
- 2 pounds Brussels sprouts
- 2 tablespoons olive oil
- 1 teaspoon salt
- ½ teaspoon black pepper
- ¼ teaspoon garlic powder
- ¼ teaspoon paprika
- 2 cloves garlic, minced
- 2 tablespoons chopped fresh parsley
- 2 tablespoons lemon juice
- 1 tablespoon water
Instructions
- Begin by rinsing the Brussels sprouts under cold water, then trim the stems and remove any damaged or discolored leaves. Pat the sprouts dry with a paper towel to remove excess moisture.
- Cut the Brussels sprouts in half and place them in a large bowl. Drizzle the olive oil over the sprouts and toss to coat, making sure they are evenly covered.
- Sprinkle the salt, black pepper, garlic powder, and paprika over the Brussels sprouts, tossing again to distribute the seasonings.
- Heat the SENSARTE 1.5 Qt Nonstick Saucepan over MEDIUM HEAT, adding the minced garlic and cooking for 1-2 minutes until fragrant.
- Add the Brussels sprouts to the saucepan, cut side down, and cook for 5 minutes without stirring. This will help create a caramelized crust on the sprouts.
- Stir the Brussels sprouts and continue cooking for an additional 10-12 minutes, stirring occasionally, until they are tender and caramelized.
- Add the chopped parsley, lemon juice, and water to the saucepan, stirring to combine. Cook for an additional 2-3 minutes, until the liquid has evaporated and the sprouts are coated in the glaze.
- Remove the saucepan from the heat and let the Brussels sprouts rest for 2-3 minutes before serving. This will help the sprouts retain their texture and flavor.
- Serve the roasted Brussels sprouts hot, garnished with additional parsley if desired. To store any leftovers, let the sprouts cool completely before refrigerating or freezing.
20. Chicken and Spinach Stuffed Shells
Serves: 6
Prep Time: 30 minutes
Cook Time: 20 minutes (MEDIUM HEAT)
Total Time: 50 minutes
Ingredients
- 12 large pasta shells
- 1 pound boneless, skinless chicken breast
- 1 ½ cups fresh spinach leaves
- 1 cup ricotta cheese
- ½ cup grated Parmesan cheese
- ¼ cup chopped fresh parsley
- 2 cloves garlic, minced
- 1 cup marinara sauce
- 1 cup shredded mozzarella cheese
- 1 tablespoon olive oil
- salt and pepper to taste
- 1 cup chicken broth
- 1 tablespoon dried basil
Instructions
- Start by cooking the pasta shells according to the package instructions until they are al dente, then set them aside to cool. While the shells are cooking, prepare the filling by chopping the spinach leaves and grating the Parmesan cheese. In a large bowl, combine the chopped spinach, ricotta cheese, Parmesan cheese, parsley, garlic, salt, and pepper, and mix well.
- In a large skillet, heat the olive oil over MEDIUM HEAT and cook the chicken breast until it is browned and cooked through, about 5-7 minutes per side. Once the chicken is cooked, let it rest for a few minutes before chopping it into small pieces and adding it to the bowl with the spinach mixture.
- In the same skillet, add the marinara sauce and bring it to a simmer over MEDIUM HEAT. Let it cook for a few minutes until it is heated through, stirring occasionally.
- To assemble the stuffed shells, lay a cooked pasta shell flat and spoon some of the spinach and chicken mixture into the center of the shell. Fold the shell over the filling to enclose it, and place the stuffed shell in the prepared saucepan. Repeat with the remaining shells and filling.
- Pour the marinara sauce over the stuffed shells and sprinkle the shredded mozzarella cheese over the top. Cover the saucepan with a lid and let it cook over MEDIUM HEAT for 10-15 minutes, or until the cheese is melted and bubbly.
- While the shells are cooking, prepare the chicken broth by heating it in a small saucepan over LOW HEAT. Once the shells are done cooking, remove them from the heat and let them rest for a few minutes before serving.
- To serve, place a few stuffed shells on each plate and spoon some of the marinara sauce over the top. Sprinkle with additional Parmesan cheese and parsley if desired.
- Finally, turn off the heat and let the saucepan cool before washing it with soap and water. The stuffed shells can be refrigerated for up to 3 days or frozen for up to 2 months, and they make great leftovers for a quick and easy meal.

FAQ
1. Is the SENSARTE 1.5 Qt Nonstick Saucepan good for college students?
Yes. It is compact, lightweight, easy to clean, and versatile for making everything from scrambled eggs to soups and pasta. It is one of the most useful kitchen tools a college student can have.
2. Is SENSARTE nonstick safe to use?
Yes, SENSARTE uses a PFOA-free nonstick coating, which is safe for everyday cooking. As with any nonstick pan, avoid overheating on very high heat and use silicone or wooden utensils to protect the surface.
Cooking in college doesn’t have to mean eating instant noodles every night. With the SENSARTE 1.5 Qt Nonstick Saucepan and this list of 20 recipes, you can eat well on a student budget with little effort and almost no cleanup.
Save this post on Pinterest, choose one recipe to try tonight, and build from there. Once you get comfortable with a few of these, the rest will come easily.