
This Zantigo Chilito recipe comes from a friend’s years of asking me to try it. He is from Minnesota and has talked about Zantigo since the last restaurant closed.
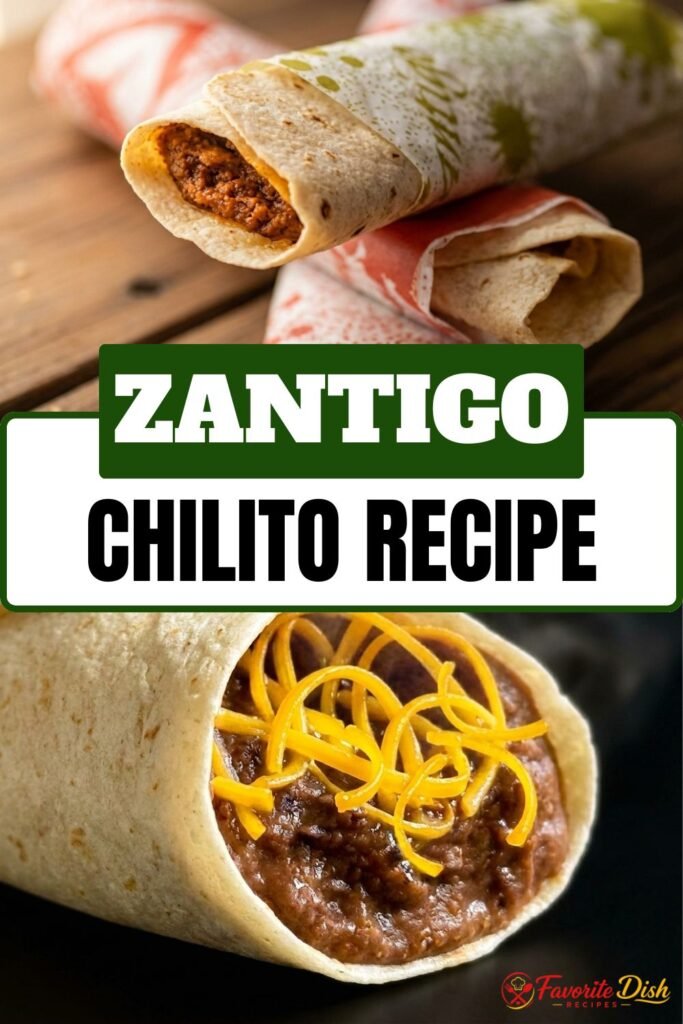
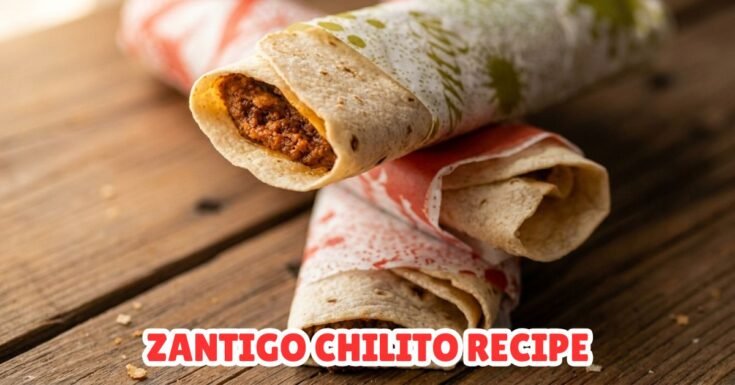
He describes it with such detail: the soft flour tortilla, the saucy spiced meat that is not quite a sloppy joe and not quite a taco, the melted deep orange cheddar, and the slight crisp on the outside of the wrap. After five test batches, I finally found the right version.
Zantigo was a chain in the Twin Cities before Taco Bell’s “Chilito” Chili Cheese Burrito came out, and many locals believe the original was better. The chili meat had a deeper, smokier flavor, and the tortilla had a slight crisp from the oven instead of being steamy from the microwave.
Why This Zantigo Chilito Recipe Hits the Mark
Many Chilito copycats resemble Taco Bell meals with their bright orange grease, thin sauce, and mushy tortillas. The Zantigo version is different. It has more sauce than taco filling but isn’t watery. The beef is flavored with cumin, chili powder, and smoked paprika, making it rich in taste but not too spicy. It’s wrapped in a real flour tortilla that gets a slight crisp from the oven.
To make the meat, start by toasting the spices in a dry pan for thirty seconds before adding them to the beef. This step enhances the flavor. Also, use masa harina instead of flour or cornstarch to thicken the sauce. Masa adds a hint of sweet corn flavor and thickens without a raw taste.
The type of cheese you use is important, too. The original recipe called for sharp, yellow-orange cheddar, the kind fast-food kitchens relied on in the late 1970s. Block cheddar, freshly shredded from a wedge, melts smoothly. Pre-shredded cheese has a coating that prevents it from melting properly.
Finally, the roll-and-bake method is crucial. Spend 5 minutes assembling the ingredients in the skillet, then bake for 10 minutes at 400°F, which gives the tortilla a slight crisp on the bottom and ensures the cheese melts throughout the filling.
What You Need to Know Before You Start
Use 80/20 ground beef, not lean. The fat is where the flavor lives, and a lean grind tastes dry once the chili meat simmers down. The fat also helps the spices bloom and evenly coat every crumble of meat.
The tortillas need to be the soft burrito kind, 10 inches across. The smaller 6-inch fajita-size tortillas split when you try to roll them around a half cup of filling. Look for the freshest tortillas the store has; older tortillas dry out and crack along the bend, no matter how carefully you warm them.
Warm the tortillas just before rolling, not at the start. A cold tortilla will crack along the fold line every time. Fifteen seconds in a dry skillet, or a stack wrapped in a damp paper towel microwaved for 30 seconds, gives a pliable wrap that folds without breaking.
Spice quality matters. If the chili powder has been sitting in the back of the pantry for two years, the flavor will be flat, no matter how much you use. Fresh chili powder, cumin, and paprika each release significantly more aroma than tired old jars.
Do not drain the beef fat after browning. Most modern recipes call for this step because they were written for low-fat diet trends. The classic Zantigo chili meat keeps the fat in the pan, which is part of why it tastes the way it does.
Common Problems and How to Fix Them
- The chili meat is too watery: either the sauce didn’t simmer long enough, or the masa harina was skipped. Continue simmering uncovered for another 5-10 minutes, stirring occasionally, until the sauce coats the back of a spoon. Stir in a teaspoon of masa harina to speed it along.
- Tortillas split while rolling: Cold or stale tortillas. Warm them in a dry skillet for 15 seconds per side or in a damp paper towel in the microwave for 30 seconds. Use the freshest tortillas you can find.
- Cheese leaked out during baking: The Chilitos were placed seam-side up, or the seam was not pressed firmly. Always place seam-side down so the weight of the filling holds the roll closed. Press the seam shut with a finger before baking.
- Flavor is flat: Spices were not toasted, or the tomato paste was not darkened. Both steps add 30-60 seconds and significantly deepen the flavor. Toast the spices in a dry pan, then let the tomato paste darken before adding liquid.
- Bottom of Chilito stuck to the pan: Parchment paper was skipped, and the pan was not oiled. Line the sheet tray with parchment or brush a light coat of oil across the surface before placing the rolls.
Ingredients for Zantigo Chilito Recipe
- 1 lb ground beef (80/20). The 80/20 ratio gives enough fat for flavor without leaving the chili greasy. Leaner beef tastes dry in this recipe. Avoid extra-lean (90/10 or higher).
- 1 medium yellow onion, finely diced. Diced small — about 1/8 inch — so the pieces almost dissolve into the meat. Larger pieces give a chunky, taco-style texture that is wrong for this dish.
- 3 cloves garlic, minced. Fresh garlic only. Garlic powder works in the spice blend, but a hit of fresh minced garlic in the pan deepens the savory note.
- 2 tbsp chili powder Standard American chili powder — the McCormick or Spice Islands blend — not pure ancho. The classic Zantigo flavor came from supermarket chili powder, not specialty single-chile powders.
- 1 tbsp ground cumin. A heavy hand of cumin is what gave Zantigo chili meat its signature warmth. Toast it briefly in the dry pan before adding the beef for a deeper flavor.
- 1 tsp smoked paprika adds a subtle smoke note that gestures toward a wood-fire flavor without overwhelming. Sweet paprika works in a pinch.
- 1 tsp garlic powder goes into the spice blend alongside the fresh garlic for layered garlic flavor.
- 1 tsp onion powder Reinforces the diced onion and helps season the meat all the way through.
- 1 tsp dried oregano (Mexican if available). Mexican oregano has a citrusy, slightly floral note that pairs naturally with chili meat. Italian oregano works as a substitute.
- 1/2 tsp cayenne pepper, just enough to register as a warm background heat. Reduce to 1/4 teaspoon for a milder version.
- 1 tsp kosher salt Salt early in the cooking process — it draws moisture from the beef and helps it brown evenly.
- 1/2 tsp freshly cracked black pepper. Coarse cracked pepper adds aroma. Pre-ground works but tastes flatter.
- 2 tbsp tomato paste adds concentrated tomato flavor and helps the sauce cling to the meat. Cook it directly with the spices for 90 seconds to darken.
- 1 cup beef stock (low-sodium) builds the sauce body. Low-sodium gives control over the final saltiness. Water works in a pinch, but the flavor is thinner.
- 1 (8 oz) can tomato sauce. Plain tomato sauce — not marinara or pasta sauce. Adds the saucy body that defines the Chilito filling.
- 1 tbsp masa harina or yellow cornmeal, the thickener that gives the chili meat its signature cling. Masa harina adds a faint corn note that fits the dish perfectly.
- 6 large (10-inch) flour tortillas. Soft, pliable flour tortillas only. Corn tortillas crack when rolled. Burrito-size (10 inches across) gives the right meat-to-tortilla ratio.
- 3 cups shredded sharp cheddar cheese. The original used a yellow-orange American cheddar. Sharp cheddar from a block, shredded fresh, gives the best melt. Pre-shredded bagged cheese contains anti-caking starches that prevent a smooth melt.
- 2 tbsp neutral oil (for the pan), for lightly oiling the baking sheet so the tortilla bottoms crisp without sticking.
Tools I Recommend for This Recipe
- 12-inch heavy skillet or cast-iron pan — for browning the beef and building the chili meat
- Wooden spoon — for breaking up the beef as it cooks
- Box grater — for shredding the cheddar from a block
- Rimmed sheet tray — for baking the assembled Chilitos
- Parchment paper or a light spray of oil — to keep tortilla bottoms from sticking
- Pastry brush — for brushing the tops with oil before baking
Step-by-Step Instructions to Make Zantigo Chilito Recipe
- Toast the spices — Heat the skillet over medium heat with no oil for 1 minute. Add the chili powder, cumin, smoked paprika, and oregano. Toast the dry spices for 30 seconds, stirring constantly, until fragrant. Transfer the spices to a small bowl. This step adds a deeper, rounder flavor than dumping cold spices into hot meat later.
- Brown the beef — Add 1 tablespoon of oil to the same skillet over medium-high heat. Add the ground beef and break it into small crumbles with the wooden spoon. Season with kosher salt and pepper. Cook for 6-7 minutes, stirring frequently, until the beef is deeply browned with crispy edges. Do not drain the fat yet — that is flavor.
- Add aromatics — Push the beef to the sides of the pan. Add the diced onion to the center and cook for 4 minutes until softened and slightly translucent. Add the minced garlic and cook for 1 more minute until fragrant. Stir everything together.
- Build the sauce base — Push everything to the sides again. Add the tomato paste to the center and let it darken for 90 seconds. Stir in the toasted spices, garlic powder, onion powder, and cayenne. Cook for 30 seconds, stirring constantly, so the spices coat every bit of meat.
- Simmer the chili meat — Pour in the beef stock and tomato sauce. Stir well and bring to a low simmer. Sprinkle the masa harina across the surface and stir thoroughly to prevent lumps. Simmer uncovered for 12-15 minutes, stirring occasionally, until the sauce thickens enough to coat the back of a spoon. The meat should be saucy but not soupy.
- Preheat and prep tortillas — While the chili meat finishes, set the oven to 400°F. Line a sheet tray with parchment paper or brush it lightly with oil. Warm the tortillas in a dry skillet for 15 seconds per side or wrap them in damp paper towels and microwave for 30 seconds. Warm tortillas roll without cracking.
- Assemble the Chilitos — Lay a warm tortilla flat. Spoon about a half cup of chili meat down the center, leaving a 2-inch border at each end. Sprinkle a generous half cup of shredded cheddar across the meat. Fold both short ends up over the filling, then roll the long sides snugly to form a sealed tube. Place seam-side down on the prepared sheet tray.
- Bake until golden — Brush the tops of the rolled Chilitos lightly with oil. Bake at 400°F for 10-12 minutes until the tortillas turn golden and the cheese inside is fully melted. Optional: sprinkle a quarter cup of extra cheddar across the tops in the final 3 minutes for a bubbly cheese crust. Rest for 3 minutes before slicing or serving — the filling is volcanic out of the oven.

Tips, Tricks, and Common Mistakes to Avoid
- Toast the spices first. Thirty seconds in a dry pan transforms cold ground spice into something with real depth. This single step does more for the final flavor than any expensive ingredient.
- Do not drain the beef fat. The browned fat carries most of the flavor. Cook off any excess by simmering until the sauce thickens, instead of pouring it away.
- Shred cheese from a block. Pre-shredded bagged cheese is coated in cellulose and potato starch to prevent clumping. That coating also prevents smooth melting. Buy a block and grate it yourself — it takes 90 seconds.
- Place seam-side down. A Chilito with the seam on top opens in the oven and spills cheese onto the pan. Seam-side down uses the weight of the filling to keep the roll closed.
- Warm the tortillas before rolling. Cold tortillas crack along the bend. A 15-second pass in a dry skillet or 30 seconds in a damp paper towel in the microwave is enough.
- Use masa harina, not flour. Flour thickens, but it adds a raw, doughy taste. Masa harina thickens cleanly and adds a faint corn flavor that fits the dish.
Delicious Variations on Zantigo Chilito Recipe
- Bean and cheese Chilito — Add 1 cup of mashed pinto beans or refried beans to the chili meat in the final 5 minutes of simmering. The beans add creaminess and stretch the filling further. A traditional Chilito had no beans, but this version is delicious in its own right.
- Spicy Diablo Chilito — Double the cayenne, add a tablespoon of diced pickled jalapeños to the chili meat, and stir in a tablespoon of your favorite hot sauce at the end of simmering. Top each Chilito with a few pickled jalapeño slices before baking.
- Pulled chicken Chilito — Replace the ground beef with 2 cups of shredded rotisserie chicken. Cook the aromatics and build the sauce as written, then fold the chicken in during the final simmer. The texture is slightly lighter than beef, but the seasoning carries the dish.
- Fried Chilito (panada-style) — Skip the oven entirely. Roll the Chilitos tight and shallow-fry them, seam-side down, in a quarter-inch of oil over medium heat for 2 minutes per side, until deeply golden. The texture is closer to a chimichanga — crisp outside, molten cheese inside.
What to Serve With
A Chilito is rich and saucy, so the sides should be bright and crunchy. Shredded iceberg lettuce with a squeeze of lime cuts through the cheese and chili meat perfectly. A small bowl of pico de gallo — diced tomato, onion, cilantro, jalapeño, lime — adds fresh contrast. Refried beans on the side work in classic fast-food style.
For a true Twin Cities throwback, serve with crinkle-cut tater tots dusted with chili powder. Pickled jalapeños on the side provide the sharp, acidic contrast the rich filling needs.
Storage Tips
Fridge
Wrap individual baked Chilitos tightly in foil or store in an airtight container. Refrigerate for up to 4 days. The tortilla softens overnight but reheats crisp. Store the chili meat separately if making ahead — assemble and bake fresh for the best texture.
Freezer
Assembled but unbaked Chilitos freeze beautifully. Wrap each one in plastic wrap, then foil, and freeze on a sheet tray until firm. Transfer to a freezer bag for up to 3 months. Bake from frozen at 375°F for 25-30 minutes. The chili meat also freezes well on its own for up to 3 months.
Reheating
Oven reheating gives the best result — 350°F for 10-12 minutes wrapped in foil, with the foil removed for the final 2 minutes to re-crisp the tortilla. Microwave reheating works in a pinch — 90 seconds on 70% power wrapped in a damp paper towel — but the tortilla loses its slight crisp.
The Zantigo Story and Why Minnesotans Still Mourn the Closing
Zantigo was a Mexican-American fast-food chain that flourished across the Twin Cities and the Upper Midwest from the early 1970s through the mid-1980s. A Minneapolis company started the chain before being acquired by Heublein, which later folded it into Taco Bell’s parent company. When the corporate decision came down to convert Zantigo locations into Taco Bells, Minnesotans lost not just their favorite local chain but specific menu items they considered better than the Taco Bell alternatives. The Chilito was the item most often cited as superior.
The Chilito at Zantigo was a chili-cheese burrito made with seasoned ground beef, melted cheddar, and a soft flour tortilla. Unlike a regular bean burrito, the meat was deeply spiced with cumin, chili powder, and smoked paprika, and the texture was saucy rather than dry. The tortilla picked up a slight crisp from a quick warming pass before being served.
Taco Bell continued to sell a “Chili Cheese Burrito” in some regional markets after the conversion, but the seasoning blend was milder, and the meat texture was different. Loyalists insisted — and still insist — that the Zantigo version was richer, saucier, and better seasoned.
A few independent restaurants around the Twin Cities still serve a Chilito or a Chilito-style burrito, and forum threads going back two decades document the slow detective work of Zantigo veterans trying to reverse-engineer the seasoning blend at home. The version on this page draws on those threads, interviews with former employees, and many side-by-side test batches.
Zantigo Chilito Recipe
This Zantigo Chilito recipe nails the Twin Cities classic — seasoned chili meat, sharp cheddar, soft flour tortilla, baked golden. Step-by-step copycat method.
Ingredients
- 1 lb ground beef (80/20)
- 1 medium yellow onion, diced
- 3 cloves garlic, minced
- 2 tbsp chili powder
- 1 tbsp ground cumin
- 1 tsp smoked paprika
- 1 tsp garlic powder
- 1 tsp onion powder
- 1 tsp dried oregano
- 1/2 tsp cayenne pepper
- 1 tsp kosher salt
- 1/2 tsp black pepper
- 2 tbsp tomato paste
- 1 cup low-sodium beef stock
- 1 (8 oz) can tomato sauce
- 1 tbsp masa harina
- 6 large flour tortillas (10-inch)
- 3 cups shredded sharp cheddar
- 2 tbsp neutral oil
Instructions
- Heat the skillet over medium heat with no oil for 1 minute. Add the chili powder, cumin, smoked paprika, and oregano. Toast the dry spices for 30 seconds, stirring constantly, until fragrant. Transfer the spices to a small bowl. This step adds a deeper, rounder flavor than dumping cold spices into hot meat later.
- Add 1 tablespoon of oil to the same skillet over medium-high heat. Add the ground beef and break it into small crumbles with the wooden spoon. Season with kosher salt and pepper. Cook for 6-7 minutes, stirring frequently, until the beef is deeply browned with crispy edges. Do not drain the fat yet — that is flavor.
- Push the beef to the sides of the pan. Add the diced onion to the center and cook for 4 minutes until softened and slightly translucent. Add the minced garlic and cook for 1 more minute until fragrant. Stir everything together.
- Push everything to the sides again. Add the tomato paste to the center and let it darken for 90 seconds. Stir in the toasted spices, garlic powder, onion powder, and cayenne. Cook for 30 seconds, stirring constantly, so the spices coat every bit of meat.
- Pour in the beef stock and tomato sauce. Stir well and bring to a low simmer. Sprinkle the masa harina across the surface and stir thoroughly to prevent lumps. Simmer uncovered for 12-15 minutes, stirring occasionally, until the sauce thickens enough to coat the back of a spoon. The meat should be saucy but not soupy.
- While the chili meat finishes, set the oven to 400°F. Line a sheet tray with parchment paper or brush it lightly with oil. Warm the tortillas in a dry skillet for 15 seconds per side or wrap them in damp paper towels and microwave for 30 seconds. Warm tortillas roll without cracking.
- Lay a warm tortilla flat. Spoon about a half cup of chili meat in a line down the center, leaving a 2-inch border at each end. Sprinkle a generous half cup of shredded cheddar across the meat. Fold both short ends up over the filling, then roll the long sides snugly to form a sealed tube. Place seam-side down on the prepared sheet tray.
- Brush the tops of the rolled Chilitos lightly with oil. Bake at 400°F for 10-12 minutes until the tortillas turn golden and the cheese inside is fully melted. Optional: sprinkle a quarter cup of extra cheddar across the tops in the final 3 minutes for a bubbly cheese crust. Rest for 3 minutes before slicing or serving — the filling is volcanic out of the oven.
Nutrition Information:
Yield:
6Serving Size:
1Amount Per Serving: Calories: 480
This Zantigo Chilito recipe brings the Twin Cities classic into the home oven. Toast the spices, brown the beef hard, simmer with masa harina until saucy, roll in warm flour tortillas with sharp cheddar, and bake until the tortilla edges turn golden. The result is the closest thing to the original Chilito most home cooks will ever taste.